Nowadays, Google is being used by more and more customers to find local businesses. A Google Map on your WordPress website is a fantastic way to encourage prospective customers to visit your physical stores, which will increase your revenue whether you own a concrete block store or sell your products to retailers. In this article, we will discuss about the best store locator plugin and how to add it to the WordPress site.
What is a Store Locator Plugin?
You can include Google Maps on your website and add store locations for any kind of store directory you wish to create by using a store locator plugin.
You may improve your search engine optimization by including a store locator in WordPress. Your store locations will appear higher in local SEO search by adding specific customized input fields and other information. We used a really nice store locator plugin for this tutorial. Let’s look at how to set up the plugin so you can start adding store locations.
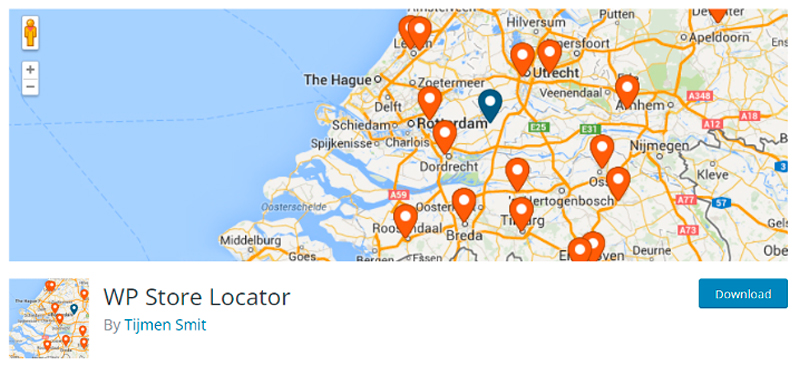
One of the greatest WordPress Store Locator Plugins out there is undoubtedly the WP Store Locator Plugin. It is a highly effective and portable location management solution.
You can easily utilize the plugin to alter the way your map looks and feels. It also enables you to create custom labels for entry fields that are simple to read and understand.
Users of your website can search for information, filter results based on a radius, and then quickly obtain driving instructions to the store of their choice.
Install and Enable WP Store Locator
You must install and activate the WP Store Locator plugin in order to begin creating your store database and advance local SEO. From the plugins page in your WordPress admin panel, you can perform this action.

After installing and activating the plugin, go to Store Locator > Settings. This may be seen on the WordPress admin dashboard’s left menu section.

Click settings, then Store Locator. This will direct you to the plugin’s primary setup and settings page. Once this has been completed accurately, you are prepared to establish and manage stores.
If you prefer to watch a video below
How to Setup Store Locator to WordPress Site?
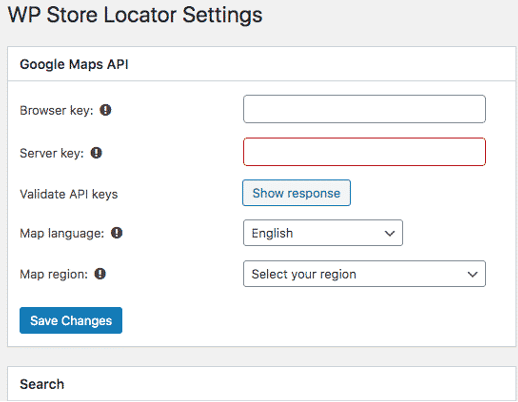
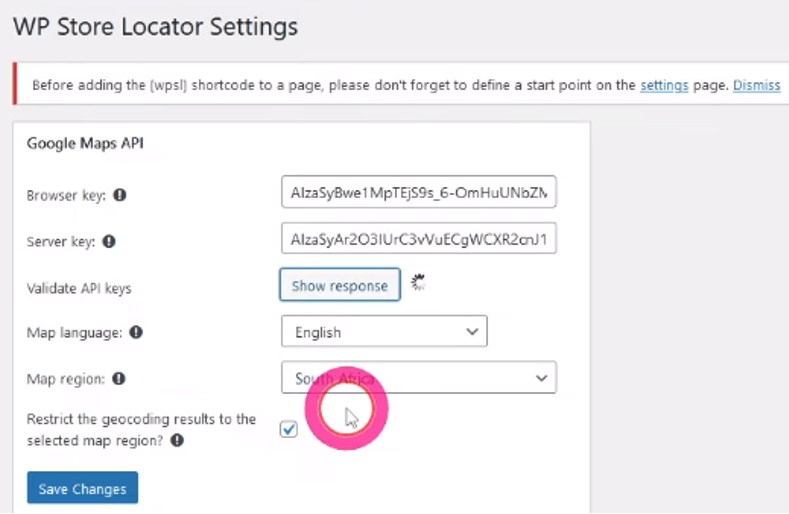
The first thing you must do is create Google Maps API keys. You must create two API keys in order to utilize the WP Store Locator plugin. The Server Key is the second one, and the first one is known as the Browser API key.
After creating your API keys, you must go the Store Locator » Settings page to configure the plugin.
Enter the browser and server API keys for Google Maps that you previously generated. Select the language and region of Maps after that, and then click the save changes button to save your selections.
Now you must go down to the “Map” area of the settings page and enter a map start point. Users can view markers that have been set at various locations because this start point could be a town or a country.

On the settings page, there are numerous additional options, such as map style, default zoom level, map type, search radius, nation, etc. They can be examined and modified based on your requirements.
The next step is to add locations after you have finished. To add your first location, go to Store Locator » New Store page. The default post or page editor in WordPress will be exactly as the New Store page appears.
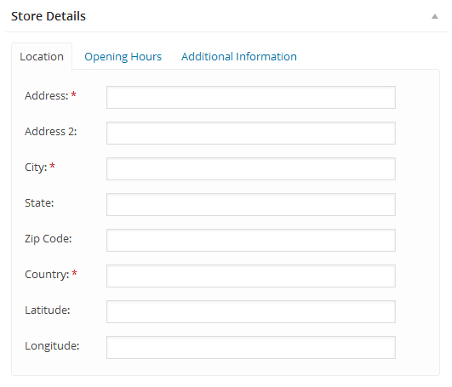
Give your store a title, and then scroll down to the “Store details” area. You must now type in the address of the store.
A map will appear in the right column, but it won’t update with the address you’ve input. To store your location, you must press the Publish button. The map will then point to the address you supplied when you reload the page. Repeat the process once again to add additional retail locations. As many store locations as you like can be added. Here, you can set store location fields, days, times, and more.
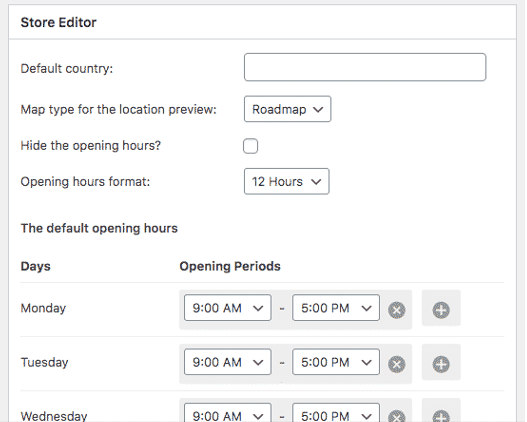
When a new store is formed, only the default nation and opening times are applied. Therefore, altering the default settings won’t have an impact on the current shop locations. Simply build a new page or amend an existing one to place your store locator on a WordPress page where you want the map to appear.

You must include the “Shortcode” block in your post edit area on the post edit screen. Add the Shortcode: [wpsl] inside it after that.
The Google Maps store locator will now appear when you click the preview button after saving or publishing your page.
You may also be interested in: How to fix google map errors
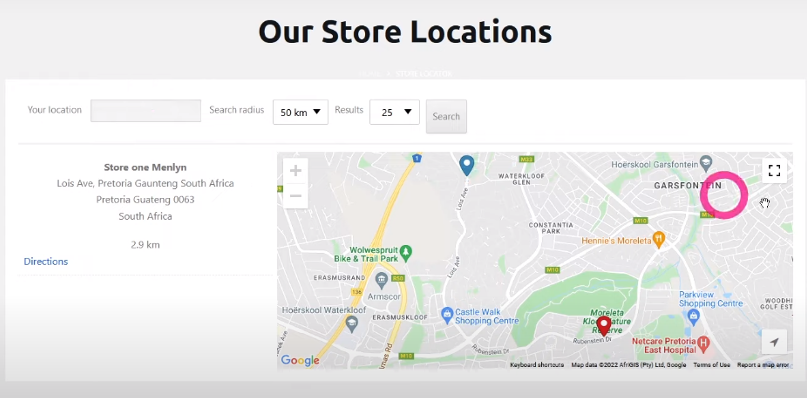
As soon as the configuration is finished, you can start creating store categories and adding new stores. The “Store Locator” tab has all of these possibilities. You can limit the search results on each page to a certain country if your locations are spread throughout the globe and you’ve made separate pages for each one.
Conclusion
It’s really simple to add a store locator to a WordPress website. You may quickly set up a fully customized store location management system by just following the instructions above. It will display your map markers for each store location and launch the map from the location you specify. For example, if Pretoria is the focused city on the map, all potential store sites will be displayed. We hope that this article will help you to add a store Locator to WordPress Site. You can also watch the video tutorial by clicking on this link:
If you enjoyed this post, we’ll be very grateful if you’d help spread it by sharing it with your friends using the share button. you can also get our latest updates by following us on Facebook, Twitter, Linkedin, and Instagram. Don’t forget to subscribe to our Youtube channel for more Tech Tutorials, Tech reviews, and Tech reviews.


